Fresh from the experience with the construction of Electric Bike 1, I set out to correct the major issues with the first build, namely lack of power and range. It's almost impossible to understand what you'll get in terms of output just from reading specs, so the first bike was necessary to define the reality of a 250W 8.8amp/hour e-bike.

This time I didn't want to mess around. I looked at two, more powerful options, the
Lunacycle 3000W mid mount (they are now selling a 7500W Monster!) and the Bafang HD 1000W Mid mount. In the end I went with the Bafang for the ease of install, the integrated controller and the apparently quieter operation. Plus 3000W? That's a beast!
I went native and found the best deal I could on China Vegas (Aliexpress.com) and after diligently checking all customer ratings and reviews, rolled the dice on a Bafang HD motor, replacement 42 tooth chain ring and a 52V 17.5 amp/hour battery. That set me back around $1,800AUD. Ouch. The Australian Peso strikes again!
 The Bafang comes really well packaged with everything you need inside. I went with the optional top of the range display. All leads and connectors included and compatible.
The battery is gigantic. And Heavy.
Make sure you get the right size bottom bracket, there are three sizes, 68mm is standard but measure first!
I then needed a bike to put it on so I looked around for the cheapest mountain bike I could find with the specs I wanted:
- Disc brakes for better stopping power,
- 8 speed gearing because 8 speed chains are thicker and more robust than 9 or 10 speed chains. I was worried about the torque on the motor...
- Lightweight, aluminium frame (cos the battery already weighed a ton).
- A decent rear derailleur.
- Preferably 29" wheels.
- Cheap! (cos I'd already blown the budget on the motor & battery)
I didn't really care about the cranks or the front derailleur as I knew they would be removed anyway.
I found what I wanted in the
HASA Galant 1.0 at CyclingDeal.com.au. Apparently reduced from $600.00 the bike only cost me $349.00 plus postage. Lightweight mountain bike, hydraulic disc brakes, 8 speed, Shimano derailleur, and 27.5" wheels (close) and super cheap!

The HASA comes partially assembled, putting it together was very easy and with the exception of a factory fault in the cassette, was complete in no time. I have to say the customer service from Cycling Deal in rectifying the fault was fantastic and with the replacement cassette in place, the bike was soon on it's way around the neighbourhood.
HASA Galant 1.0 straight out of the box.
The wheels looked really good for the price but that seat's gonna hurt... Right hand picture shows what came out of the box. Wheels, handlebars, pedals and seat is about all you have to do, the rest is just adjustment.
I set the bike up correctly for pedal power first because if I had any issues with the motor I wanted to know they weren't related to the operation of the bike.

Once the bike was setup, including gear settings, brakes etc., I grabbed the motor and began the install for that. The motor comes with zero instructions, but is relatively straight forward to install.
I removed the cranks and bottom bracket, then the motor just inserts directly into the bottom bracket socket.
There is geometry in all of this and once I'd installed the motor, I discovered the the crank casing was fouling against the frame.
I had to add a spacer between the motor and the bottom bracket to push the crank away from the frame. That impacts the geometry of the drive train, more on that later, but it allowed for a proper seating between the motor and the bike.
The final gap between the frame and the crank casing. I had to use about a 2.5 mm spacer.

With the motor through the bottom bracket and clear of the frame, it was then down to positioning.
In most installs I've seen on the web, the motor swings upwards towards the front of the bike, and is attached to the part of the frame that angles upwards towards the forks. However, the HASA has a flattened section on the bottom bracket with a considerable weld that that prevented that.
The motor sat snugly against this part of the frame and miraculously didn't foul the cable that ran below the bottom bracket and back to the rear derailleur.
It was almost like it was meant to be that way, and I couldn't think of a reason why the motor had to be attached to the front down tube. With the motor securely in place, I felt like I had just experienced one of those rare moments when things just fit together against seemingly impossible odds. A true workshop miracle. I thanked the saints and moved on.
The next part was easy, there is triangular shaped bracket that goes on the non chainwheel side, with the ridges on the plate facing into the bike, hard up against the bottom bracket. Two bolts hold it in place, tighten loosely until you have the bracket nut in place. The bracket nut is the solid nut, it goes flat face side into the bike. Tighten that to the suggested torque if you have the special tool to do that, otherwise use a hammer and cold chisel and give it some curry, like I did. Then tighten the two bolts on the triangular bracket. I put some lock-tite on the bracket nut, everything else comes pre coated.
Finally, tighten the outer facia nut onto the bottom bracket with a standard bottom bracket wrench.

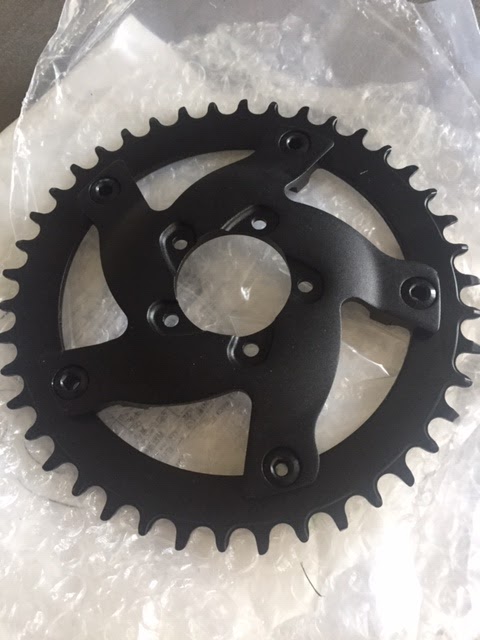
At that point the motor was in place and looking good. The motor comes with a 46 tooth chain ring that has a fairly deep dish to it which allows it to sit close to the bike frame. I'd purchased a 42 tooth chain ring to make pedalling easier if I ever ran out of juice.
While being a sanctioned replacement part, I don't think the 42 tooth has as deep a dish as the original, this means the chain ring aligns to a higher gear (smaller cog) at the back. This may have implications for additional load on the motor, which is then probably negated by the smaller chain ring.
I attached the replacement chain ring to the motor, I may experiment with the other chain ring later.
The replacement chain ring. Though it looks way better than the stock chainring it may not actually be a better choice.

Once that was done it was down to the crank arms. The motor comes with two crank arms that are seemingly identical, however as all great bike mechanics know, the thread on the left crank is reversed. So they're not identical.
Due to the excitement of getting the motor fixed onto the bike with almost no drama, I didn't even think of that until the exact moment when I had installed both cranks.
As expected, in a 50:50 bet, Murphy always wins so I switched the cranks over.
Booyah! This thing is starting to look real!
I attached the chain, given the chain ring was around the size of the middle crank that came with the bike, I left the length alone.
The battery installed easily, the bracket bolting into the drink holder sockets with plenty of room to spare although I did have to install the battery conceptually upside down due to the location of the drink holder. No big deal, the wires were long enough. The battery will need a strong zip tie due to the size and weight of it and the bolts are located towards the lower end of the bracket.
The electrics were next and the little gap in front of the rear wheel became a perfect place to feed the wiring. All the wires have colour coded plugs and arrows to line up the sides so it's almost impossible to go wrong. There's a wire that attaches the throttle to the monitor, which then has to connect to the motor, there are wires to hook up to the battery. Those were straight forward.
The brake levers that came with the motor are designed for calliper brakes and I though it's probably possible, I didn't want to remove the disc brake levers and replace them. This means there is no feedback to the motor when the brakes have been engaged. This is a sensible safety feature however if you back pedal just slightly the motor cuts out anyway so it's not really a big deal yet. I'll probably revisit the brakes down the track.

The last wire connects the motor to the speed monitor which measures the speed by the rotation speed of the rear wheel. The monitor sits against the frame next to the back wheel and a magnet attaches to the rear wheel. It's critical that these two items are lined up perfectly and as close to each other as possible. The positioning on the HASA was tricky because there's a brake cable in the way and the bracket seems to be a little to large but a couple of zip ties set it in place. If the positioning isn't in line or close enough the motor can't gauge the speed and will cut out. Another good safety feature.
The alignment and setup of the sensor and the spoke magnet. It's typically an easy install, better if your zip ties aren't bright yellow, but the bend in the Galant's frame didn't help, neither did the brake cable. That obviously wouldn't be there on a calliper system.
Mission Control. It looks like the monitor is covered in plastic but that's actually just reflection. To the left of the monitor is the on/off, assist and information selector, you can dial that in whilst in motion and to the left of that, the thumb throttle. Not exactly a black leather and chrome Harley look alike... Now there's an idea!
Time for a test ride! Yep, that seat's gonna hurt...
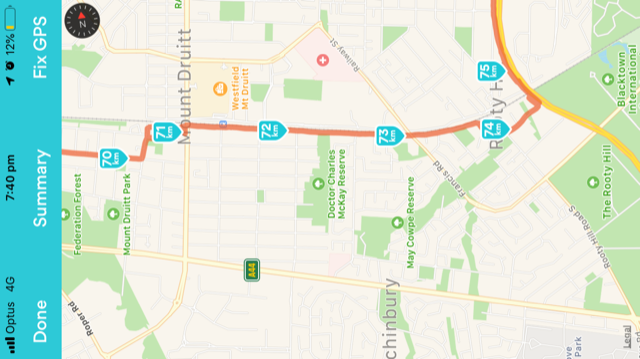
The first ride was short, to about the end of the street where the motor cut out. The display showed error code 21, which after some internet searching turned out to be caused by misalignment of the speed sensor. Once that was fixed I took the bike out for a quick 7km ride.
The bike has 9 assist levels, where 9 is the most powerful. 9 takes a while to get used to as the bike just takes off. 4 is a good place to start. The assistance feature is great and you can use the throttle while the assist is on.
The throttle (and the assist) isn't really a throttle as such, on the setup I have it's almost like an on/off switch for power. Power is delivered gradually, to a maximum, almost like the motor winding up.
The chain needs to stretch laterally. The chain ring doesn't seem to like moving through too many gears and now that the bike is effectively a 1-8 configuration there will need to be a little more give in the chain to keep it on the cogs. I expect that will occur through use.
After 7km the bike was barely showing any power loss in the battery. This is obviously overstated so will need to be watched. It's likely that the battery monitor may appear to discharge faster as the power is used up. I think the speedo is also overstated. The bike was showing a top speed of 57km/hr down a considerable hill. While that's not out of the question, I didn't feel like I was going that fast. More accurate measurement is required.
Other than that the bike is incredible. It flies up hills and the assist is super relaxing. You don't really need to use the motor on the flat but I found I couldn't resist, you can just fly along at speed and the front cranks stay stationary as the motor turns the chain. It's absolutely brilliant.
Stoked!